PageMill
Lessons
Netscape
Composer Lessons
If you've just come here from the previous lesson, you can see that this page is very different from the last. You can't help but notice the background has changed. What's this below? A Picture?
Let's look at the things that make this page different from the last.
In this lesson, you will learn the basics. Below is a clickable list of those essentials.
Here's a list of the most important things to do "first" when creating a website. I will reference FrontPage 2000 as the web-authoring software in this document.
You've saved your first web page, but the title of the web page that will appear in the Netscape or Explorer title bar will be "New Page 1" unless you change it now. Pretty spiffy, you say? It's spiffier than "Untitled Document", but it is probably not what you want.
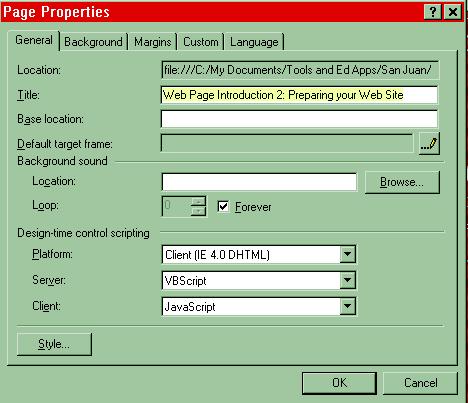
So let's change the title. You need to realize that the title is different than the name you used when you saved your page as an html document. In this title, of course, you are allowed to use capitals and spaces because this is a title that normal people read when they see your web page. The HTML thing is only for geeks who make web sites. In FrontPage, go to File => Properties... and the window that opens will show you a Title box where you may type a nice title for your page. It looks like this. Notice that this Page Properties window gives you some other tabs to click on as well. Nice things to know for later!
A "heading" is different than a "Title" and they are both different than the file name of your html document. If I were to design a little quiz on this, I would ask, "Do you know the difference between a heading, a title and a file name in a web page?"
You would respond, "Yes, of course I do."
A "heading" is just what the name implies. Like a title and a file name, it is a reference. In the case of a heading, it's text that is usually formatted a little differently (bold, italic or underlined text) than what appears below it. It appears at the top of a section of text in the Edit area of your web page. Here's how you make a heading.
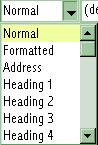 This
menu will allow you to select the Heading you prefer. Heading 1 is
the largest. You can make the heading even larger by following the
instructions below.
This
menu will allow you to select the Heading you prefer. Heading 1 is
the largest. You can make the heading even larger by following the
instructions below.
 to select the font size you prefer.
When adding basic text after
a title, press return and click "Normal" in
the Style drop-down menu in FrontPage.
If your text is still "centered" switch to left
justify, and begin typing a message. Explore the FrontPage tool
bars and discover how to change the color of text. ![]() Fool around with the boldface, italic and underline options. Naturally,
you will want to experiment with fonts, too. Try adding bullet
and numbered lists as well. Those options are in the Style drop-down menu
you see at the right.
Fool around with the boldface, italic and underline options. Naturally,
you will want to experiment with fonts, too. Try adding bullet
and numbered lists as well. Those options are in the Style drop-down menu
you see at the right.
FrontPage uses the Page Properties window you saw above. Go to File => Properties... and click on the "Background" tab. In the window that opens, you will find that you can choose "Colors" or "Formatting".
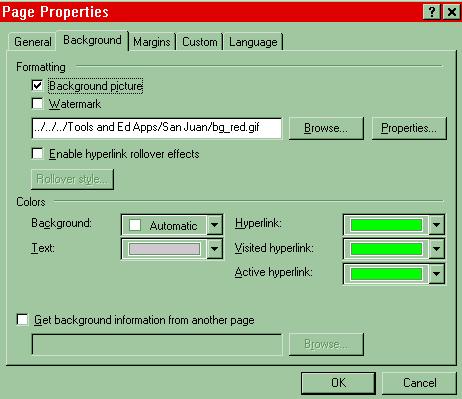
Choosing a background color is obvious. Just click on the little downward arrow in the box showing "Automatic". You can also change the color of your links and text in this window. If you choose "Formatting" you need to browse your hard drive or local server to your website folder where you may have a background image stored. If you try this option now, you need to know that the background image you choose should be in your website folder before you add it to your page. It's good practice to do things this way. In the example above, you can see that I've browsed through the subdirectories (folders) on my hard drive until I located ... /Tools and Ed Apps/San Juan/bg_red.gif."
There are several types of links.
Only the first three links in the above list are currently used in web page authoring.
Note: You really don't need this section right now. It's meant for longer documents, but you certainly may read this part and try my suggestions if you like. Alternatively, you may skip to Site Links.
Did you notice that you can
link to a part of this page by clicking on one of the items in
the list at the top? You can also click on the Back
to top ![]() arrow and link back to the top (go
figure). Well, those are anchor links in most web-authoring applications, but
they are called bookmarks in FrontPage probably because Microsoft was being
consistent with Office applications where anchors are called bookmarks.
To set a bookmark, you need a long document like this one. You
can make your document longer by pressing the Return key about fifty thousand times. Every ten rows or so, enter some text to link to. To place
your bookmarks, you simply place the cursor next to the section
where you would like your visitors to end up and insert a bookmark by choosing "Insert" on the menu bar and selecting "Bookmark". A window opens asking you to name the bookmark.
arrow and link back to the top (go
figure). Well, those are anchor links in most web-authoring applications, but
they are called bookmarks in FrontPage probably because Microsoft was being
consistent with Office applications where anchors are called bookmarks.
To set a bookmark, you need a long document like this one. You
can make your document longer by pressing the Return key about fifty thousand times. Every ten rows or so, enter some text to link to. To place
your bookmarks, you simply place the cursor next to the section
where you would like your visitors to end up and insert a bookmark by choosing "Insert" on the menu bar and selecting "Bookmark". A window opens asking you to name the bookmark.
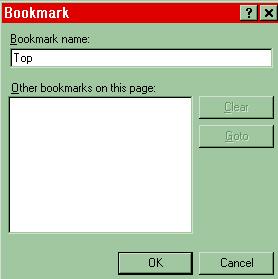
Give your bookmark a name and hit OK. You can see in the example above that I've named a bookmark "Top".
In order to establish a link to a bookmark,
select your text, click on the link icon.  The "Create Hyperlink" window opens.
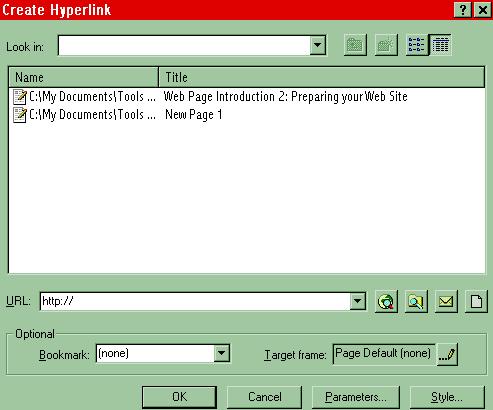
At the bottom of this window you'll see the "Bookmark" drop-down menu. Choose the
bookmark you named previously and want to link to and hit OK. You can make
many links to one bookmark. For example, in this page, there is a bookmark at the top
called "Top" where all the
Back to top ![]() links
end up.
links
end up.
To get help with this and any other topic, select "Microsoft FrontPage Help" in the "Help" menu.
These are links to other pages in
your website. A web site has more than one page, and pages are all
linked. When you upload your site, all your links become addresses
or URLs (Universal Resource Locators). Obviously,
you can only link to another page in your site if you actually have more
than one page! So make a new page right now. Go ahead. Give
it a name like secondwebpage.htm and save it to your folder. Go back to your first
page and link to
that page by typing some text like, "Go to my next page." Paint that text and
press the Link Icon or Control K. The "Create Hyperlink" window opens and you choose
the second icon to the right of the URL box. Navigate to your folder that
contains the page in your site that you want to link to and hit OK.

Obviously, you want to save pretty regularly (Command or Control S). Don't say I didn't warn you.
If you think about it, you probably realize that anything you can select can also be a link. Hmmmmm! Does this mean images (including animated gifs and jpegs) can be selected and linked?
These are the world wide web
links that are so cool because they connect your site to the outside
world. To make one, follow the same procedure as you did to make
a Site Link. Paint the text you want to link
and click on the Link Icon again. You already know the "Create Hyperlink" window looks like this.
With "Create Hyperlink" window and your web browser open, click on the first icon to the right of the URL address box in the "Create Hyperlink" window. Now click on your browser window and go to a web site. When you return to FrontPage, you'll find that a link has already been inserted for the last URL you visited. You can also copy URLs from the Netscape or Explorer Location Bars and paste them to the URL address box. This saves time and eliminates keyboarding errors. "Copy and paste" is used a great deal in web page authoring.