![]()
![]()
![]()
![]()
![]()
![]()
Assignments
ASSIGNMENT 1 - ASSIGNMENT 2 - ASSIGNMENT 3
The purpose of the assignments is to encourage further practice for the topics covered in our book but not covered in class (due to time constraints) and to give you the opportunity to work on more comprehensive exercises than those covered in the book. Rather than giving you homework assignments centered on different topics, I prefer to give you homework assignments that build and refine a single solution. This semester's assignments will automate the real estate web site.
Assignment Submitting Standards:
|
ASSIGNMENT 1 (work with a peer) top PURPOSE The purpose of this assignment is to provide you with a comprehensive exercise to practice the following material:
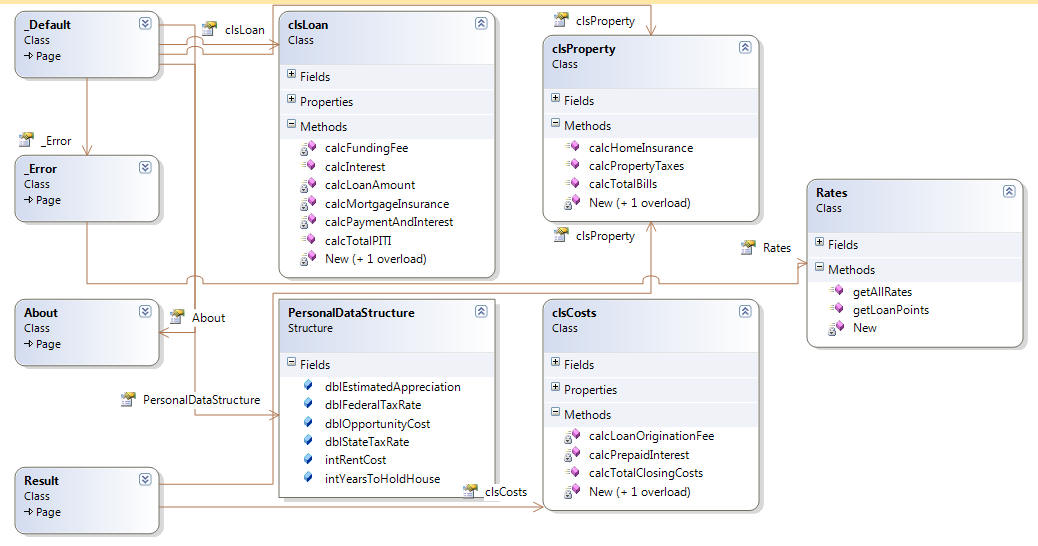
I will demonstrate this web form in class and will provide more clarification. Files Needed: MIS124Assignment1Files.zip Here is the Solution on my server: http://130.86.61.56/Assignment1/ Application Design
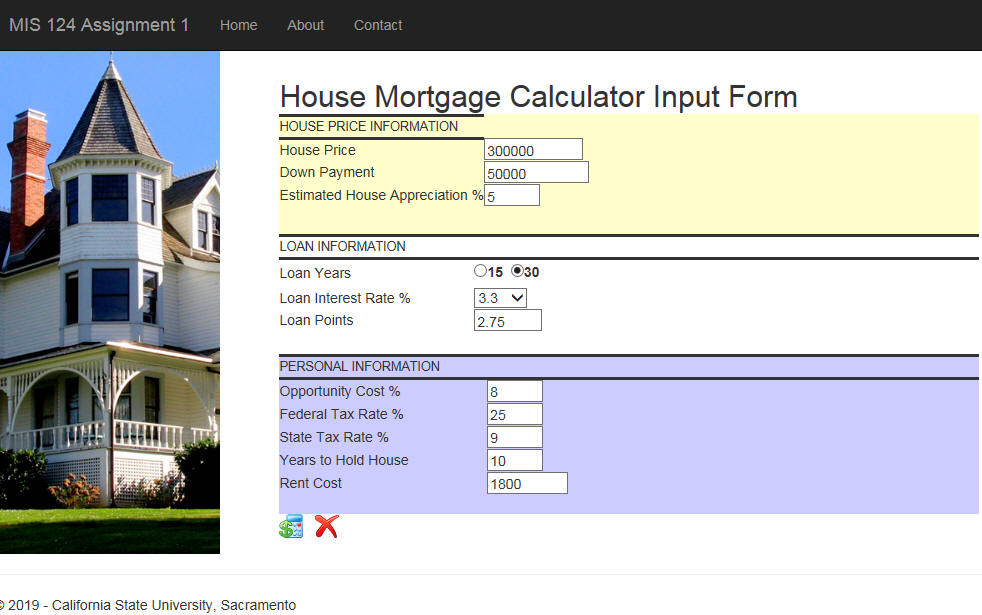
User Interfaces Default.aspx:
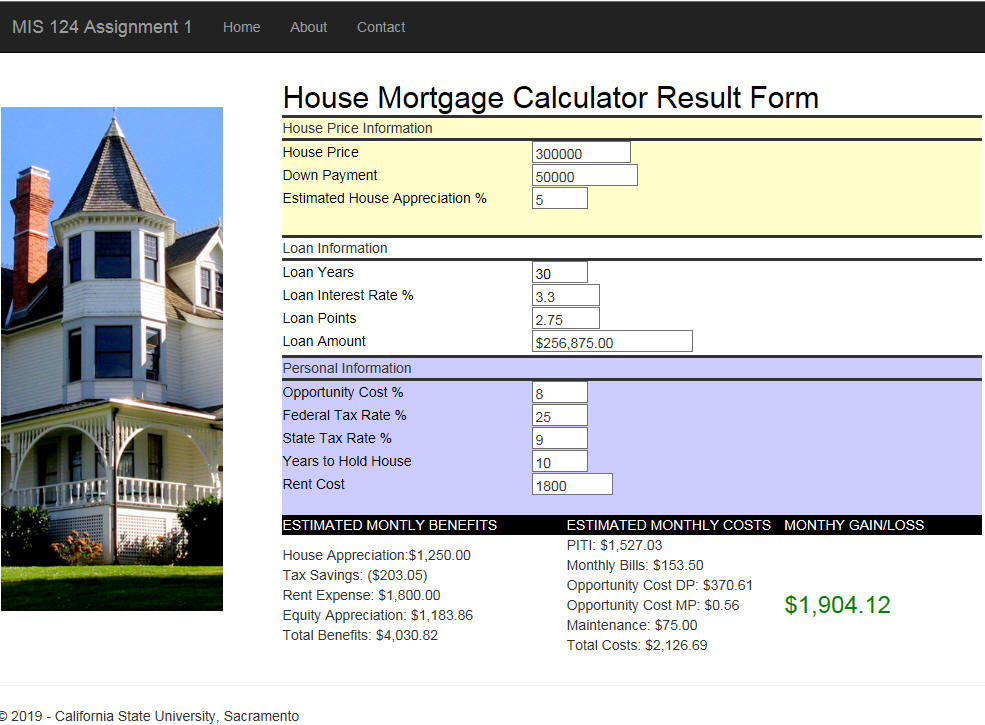
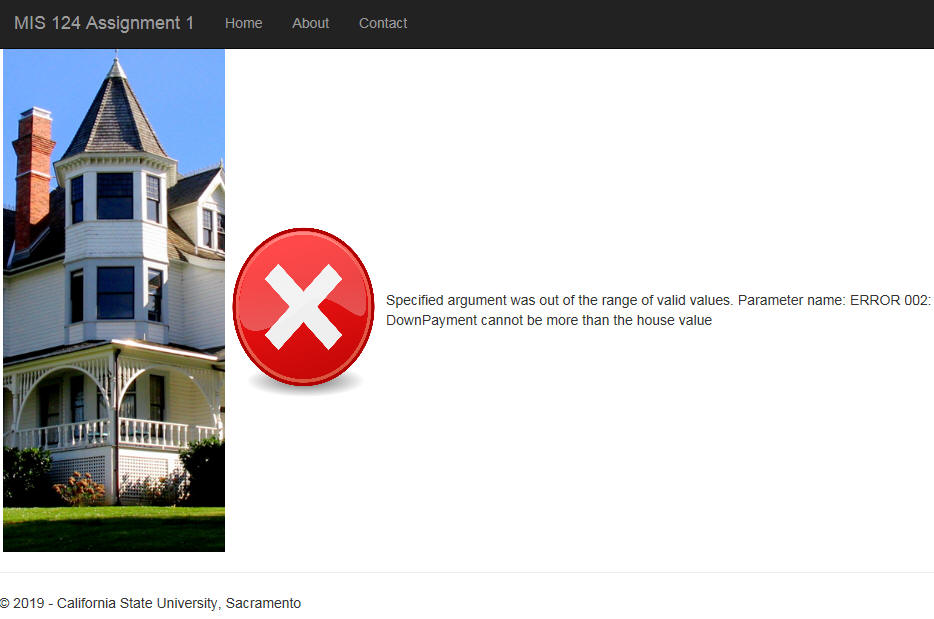
Result.aspx:
Appreciation = HousePrice * AppreciationRate / 100 / 12 Validation and Business Rules
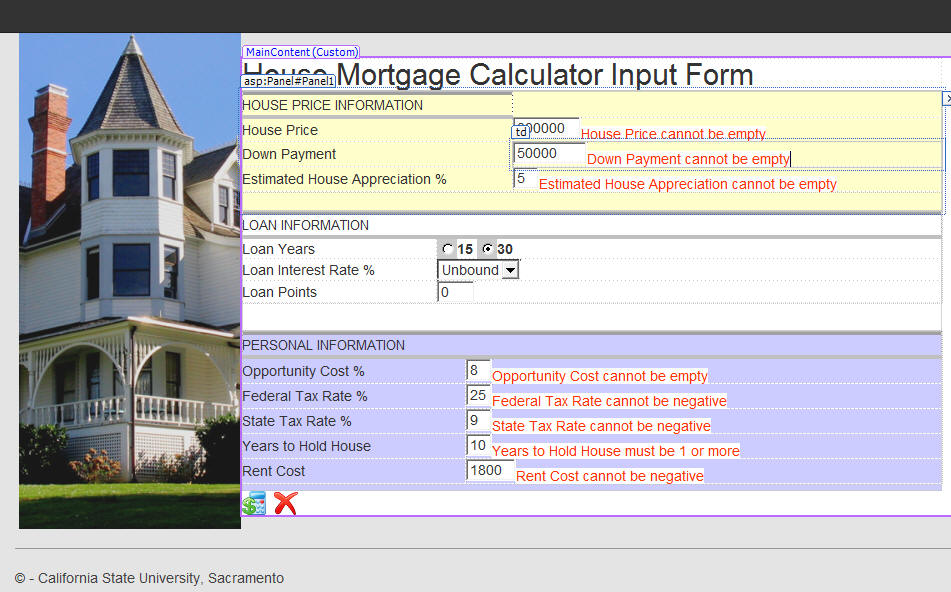
In the Default.aspx form, use the validations shown above.
Other
|
|
PURPOSE The purpose of this assignment is to provide you with a comprehensive exercise to practice the following material:
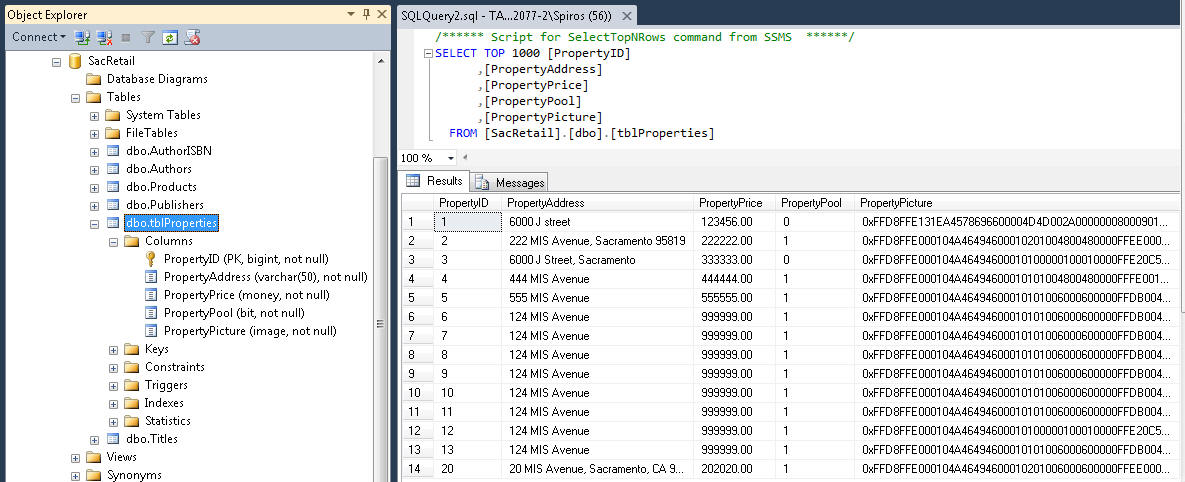
Database Design
Database uses the same connection string, user name, and password that we have been using for our Lab assignments. Application Design
User Interfaces Default.aspx:
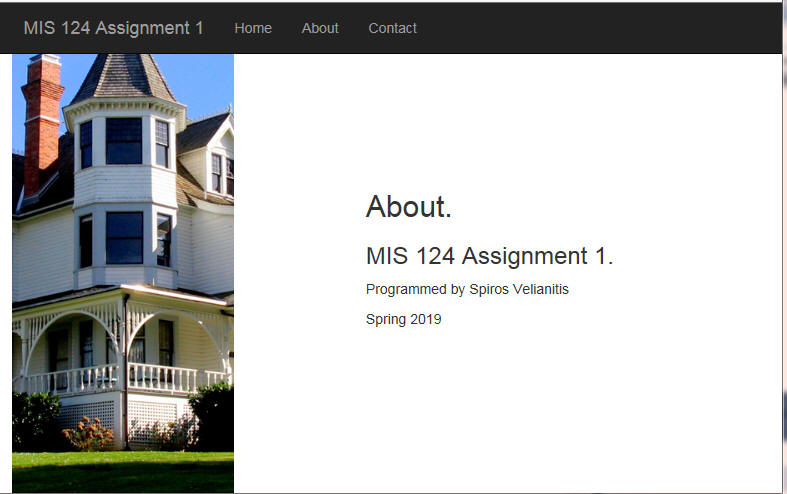
Info.aspx
PropertyManagment.aspx
Here is the stock picture:
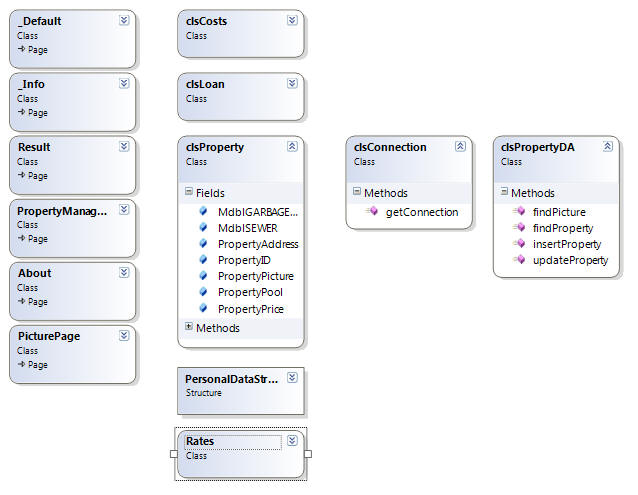
private void
displayPicture() 'This is a page that receives a
propertyID, seaches for the picture in the database for that property } Copy the PicturePage Page_Load code to an empty web page. Here is the answer to Assignment 1, with small modifications to make it easy for you to start Assignment 2. You may freely use some or all of its content. Here is a backup of the database. SacRetail.zip |
|
PURPOSE The purpose of this assignment is to provide you with a comprehensive exercise to practice the following material:
|
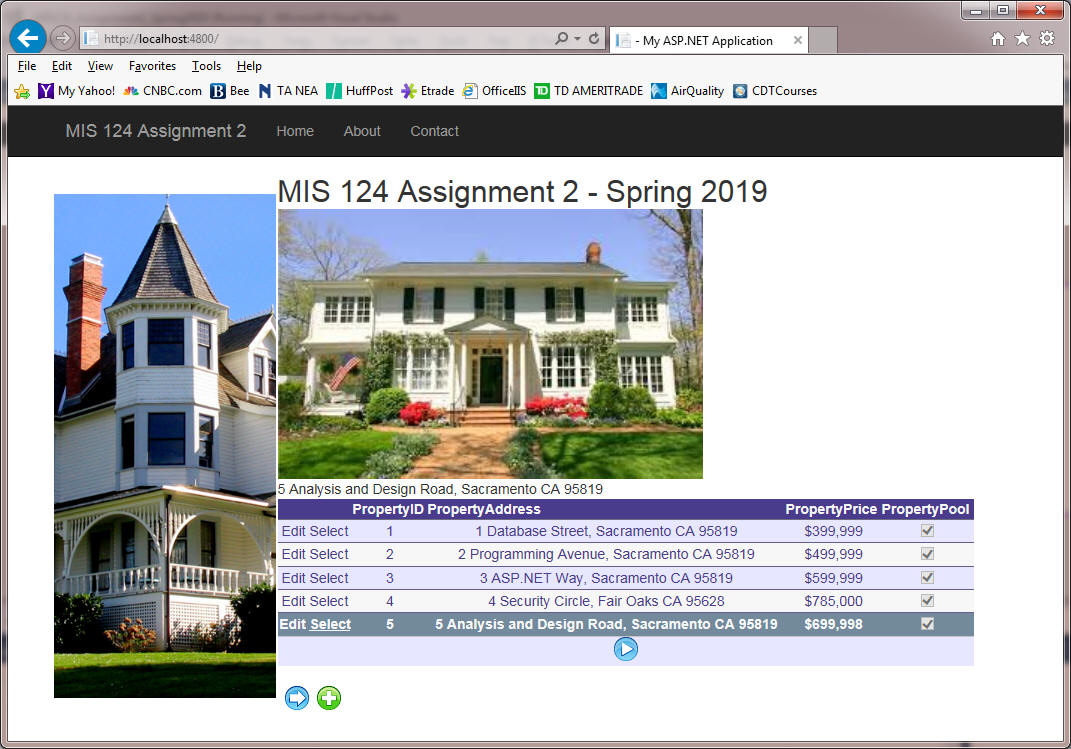
 This button takes you to the Info.aspx page (it is the Default.aspx
from assignment 1), as shown in the image below. The Info.aspx page
is the same as in assignment 1 except that the House Price (from the
selected Grid View property) is passed to the Info.aspx page (look
at the URL address in the image below). This button is only visible
when the user selects a Property from the Grid View.
This button takes you to the Info.aspx page (it is the Default.aspx
from assignment 1), as shown in the image below. The Info.aspx page
is the same as in assignment 1 except that the House Price (from the
selected Grid View property) is passed to the Info.aspx page (look
at the URL address in the image below). This button is only visible
when the user selects a Property from the Grid View. This button takes you to the PropertyManagement.aspx page (shown
below) where you can add a new Property to the database.
This button takes you to the PropertyManagement.aspx page (shown
below) where you can add a new Property to the database.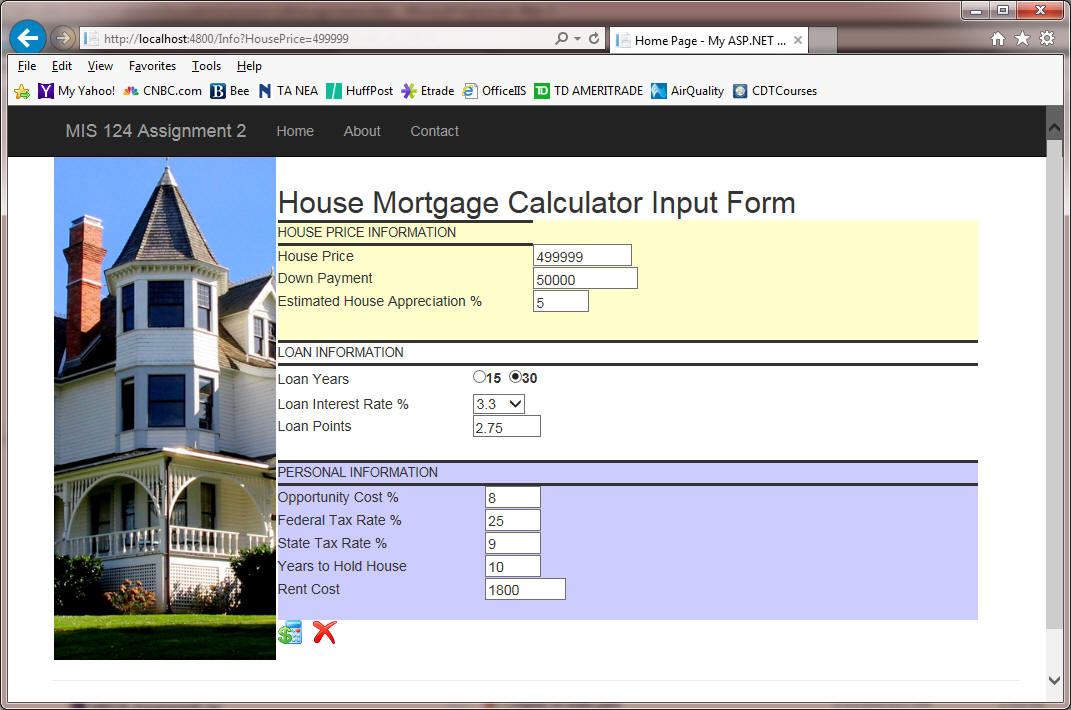
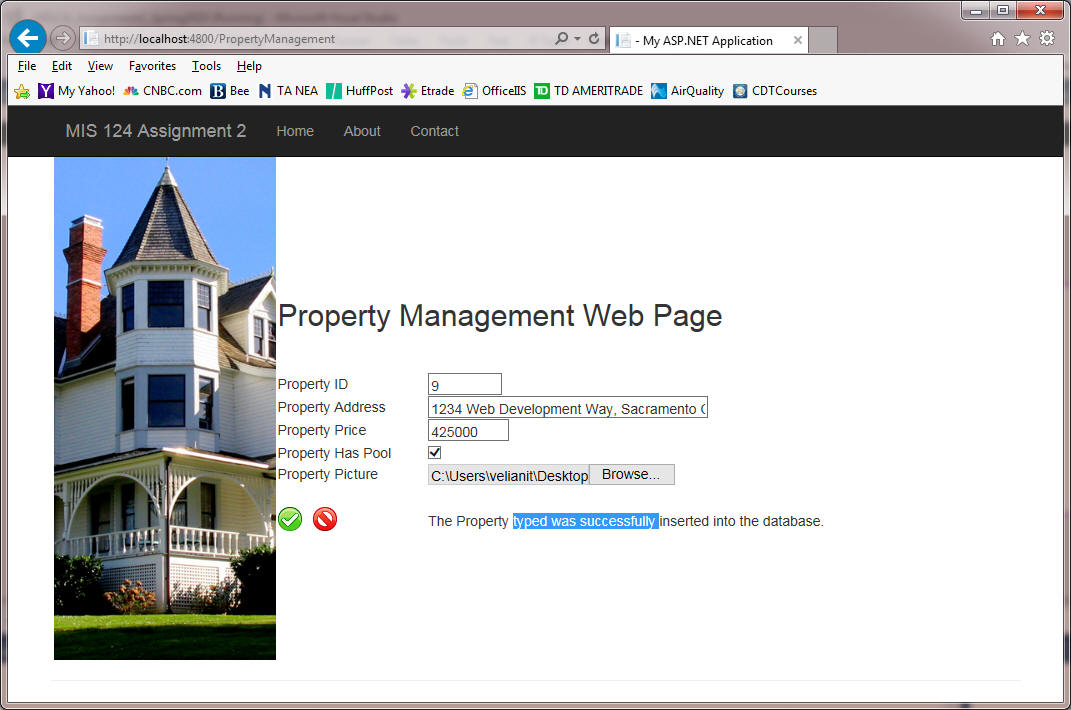
 This button executes the data insert to the database.
 This button cancels the insert and takes you to the Default.aspx.
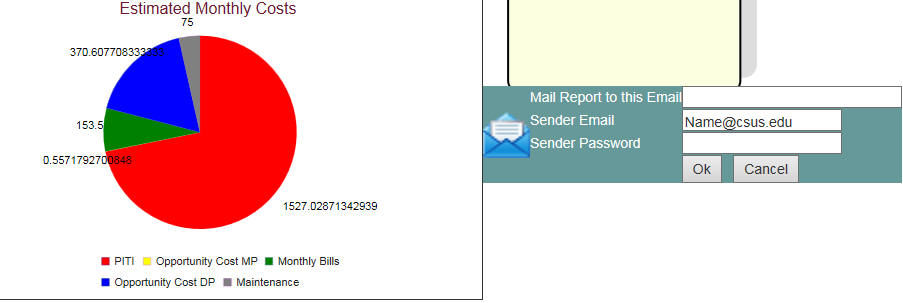
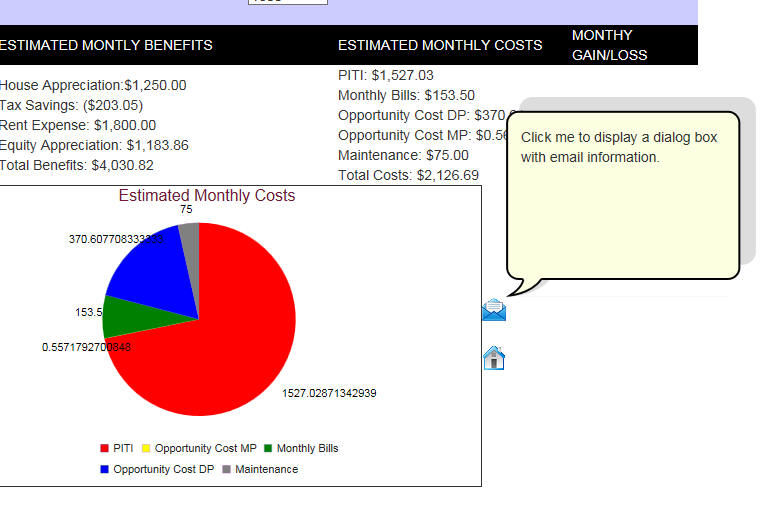 Figure 3.1