Support Page Content
Advanced Class Scheduling Manual: Equivalencies & Combined Sections
Table Of Contents
Equivalencies & Combined Sections
Cross-listed terminology does not technically exist in PeopleSoft. Instead, the term "cross-listed" has been replaced with the term "course equivalent". Course Equivalencies are set up in the Course Catalog and roll down to the Schedule of Classes. At the Schedule of Classes level, the following steps need to take place to link the sections of equivalent courses. (The same process applies for any combined sections that meet in the same place even if they are not cross-listed.)
Note: This process copies a meeting pattern to all combined sections so you ONLY ATTACH A MEETING PATTERN ON ONE OF THE CLASS SECTIONS to be combined.
Course sections that have different meeting and time patterns cannot be combined. If course sections need to be grouped with separate meeting and time patterns refer to the Class Associations/Groupings section of the Advanced Scheduling Manual.
All Learning Communities are combined by Academic Affairs. If there are any problems noticed with LCOM courses please contact Academic Affairs.
Combined Sections Table
The Combined Sections Table allows you to set up an ID for each set of Combined Sections that you need to establish.
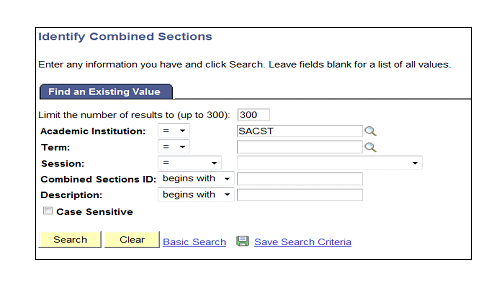
Navigation: Curriculum Management > Combined Sections > Combined Sections Table (Figure 15: Search page.)
- Enter "SACST" for the Academic Institution.
- Enter the appropriate Term Code. Use the magnifying glass to look up the term value, if necessary.
- Select Regular Academic Session from the Session dropdown list.
- Click the Search button.
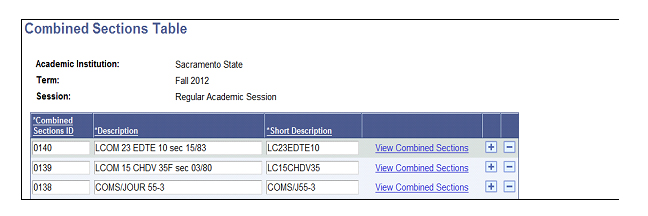
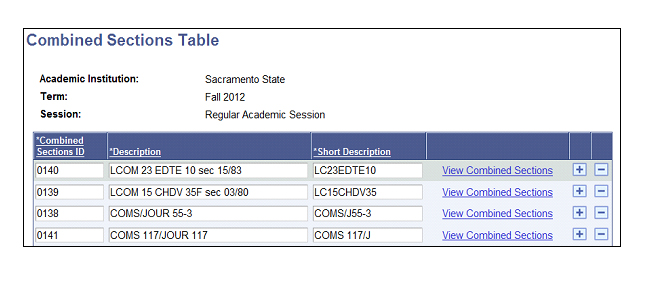
The Combined Sections Table will display all Combined Sections ID's already set up for the Term and Session you specified. (Figure 16: Combined Sections Table.)
- Click the plus (+) button to insert a new line and add your information. (Figure 17: Adding new Combined Sections ID.)
Note: If you are taken to a blank table you can simply start by filling in the Description field on the existing blank line.
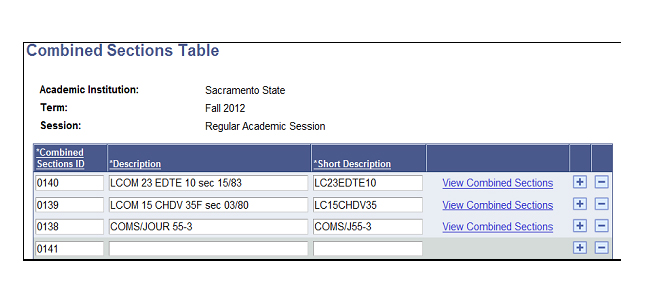
- The Combined Sections ID field will default. Enter a Description to identify your combined sections (32 character limit).
- Enter a Short Description for identification purposes (12 character limit).
- Click the Save button at the bottom of the page. (Figure 18: Saved data.)
Now that you have created a unique ID for your combined sections, you will need to associate the individual class numbers with that ID.
- Notice that a View Combined Sections link is now displayed for the Combined Sections ID you just created. You can click this link and skip to step 7 below or continue with the first instruction below.
Identifying Combined Sections
The Identify Combined Sections option allows you to link the specific class sections that will be combined under each Combined Sections ID. This process must be completed after the Combined Sections ID is created.
Once you link combined sections, all sections adopt the meeting and instructor information from the primary section. (This feature can be disabled by checking the Skip Mtg Pattern & Instr Edit box on the Identify Combined Sections page.)
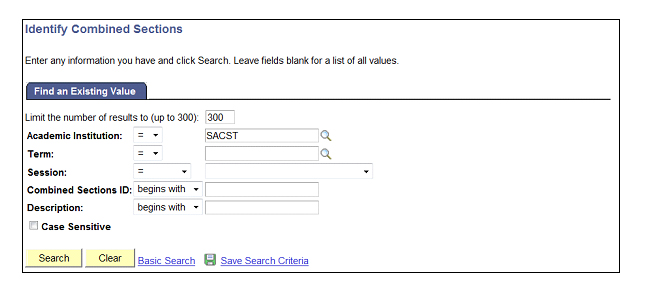
Navigation: Curriculum Management > Combined Sections > Identify Combined Sections (Figure 19: Search page.)
- Enter "SACST" for the Academic Institution.
- Enter the appropriate Term code. Use the magnifying glass to look up the term value, if necessary.
- Select "Regular Academic Session" from the Session dropdown list.
Note: You can also use the Combined Sections ID or Description fields to search by if you know this information.
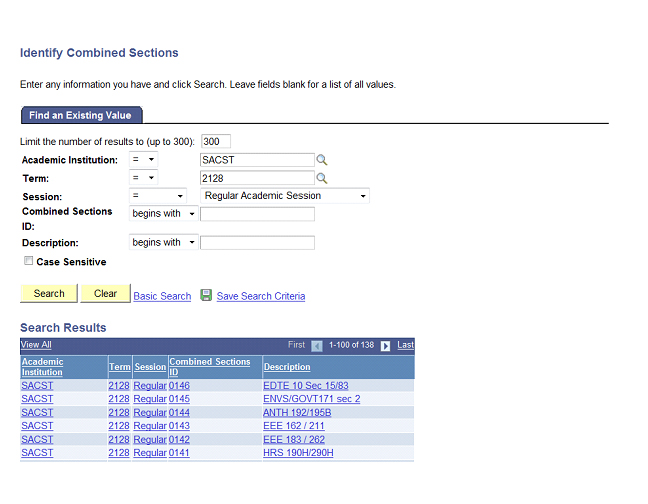
- Click the Search button. (Figure 20: Search results.)
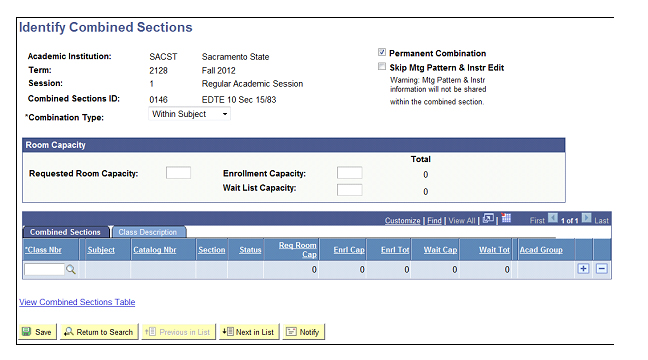
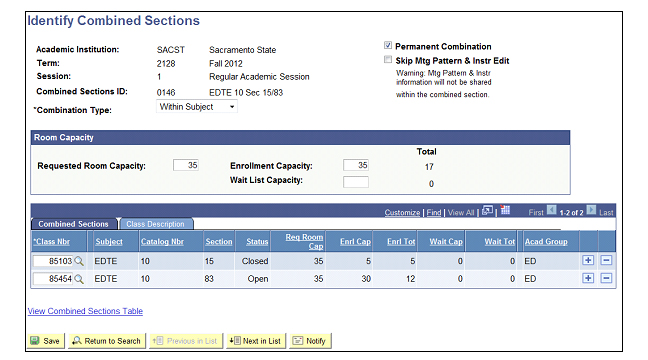
- Depending upon your search criteria, you may have to select your Combined Sections ID from a list of results at the bottom of the page. (The Short Description will display for identification purposes.) (Figure 21: Identify Combined Sections page.)
- Check the Permanent Combination box if you want the system to copy this combination over to the next term when the Prior Term Copy Process is run. If the checkbox is blank, the system assumes this is a one-time combination
- Use the Combination Type dropdown to select whether this is a "Cross Subject" combination, "Within Subject" combination, or "Both".
- Both is used when there is three or more course sections combined. For example if HRS 1, HRS 101 and HIST 101 were to be combined the Combination Type would be flagged as ‘both’ since two HRS sections are ‘within subject’ with the ‘cross subject’ being the HIST course section.
- Cross Subject is used when the combined sections are derived from two different subjects. For example if HRS 101 and HIST 101 were to be combined the Combination Type would be flagged as ‘cross subject’
- Within Subject is used when the combined sections are derived from the same subjects. For example if HRS 1 and HRS 101 were to be combined the Combination Type would be flagged as ‘within subject’
- At the bottom of the page, click the magnifying glass next to the Class Nbr field to identify the first course.
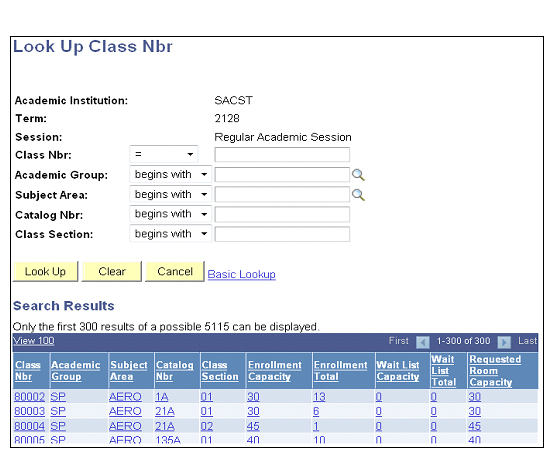
- Enter any necessary search criteria to locate the appropriate course. (Figure 22: Look up Class Nbr)
Note: There is an issue with this Catalog Nbr search field. To search by Catalog Number, enter a percent sign (%) before the number you want to find. This process will return any Catalog Numbers containing the number you entered (e.g., "%10" could return 10, 100, and 110).
- Click the Look Up button.
- Select the desired class section from the list of results.
- You will be returned to the Identified Combined Sections page. Click the plus (+) button to insert a new row and identify the next class.
- Click the Class Nbr magnifying glass in the row you just added.
- Repeat the lookup procedure and select the desired class section.
- Continue to add class sections using the plus (+) button to insert as many rows as necessary. (Figure 23: Class sections identified.)
- Enter the capacities for the enrollment and wait list in the Combined Capacities section. (Please refer to wait list guidelines).
Note: The Requested Room Capacity value is not being used for room scheduling; you can leave this field blank
- Click the Save button at the bottom of the page. (Figure 24: Capacities entered.)
As seen in the example above, the Enrollment Capacity and Wait List Capacity values can be set to match the values for the combined class sections. The Combined Capacity values will act as overall capacities for the Combined Sections ID. In other words, a Combined Enrollment Capacity of 30 will allow for a total of 30 enrolled students under the Combined Sections ID (all 30 students may end up in one class section or the enrollment may end up dispersed throughout various sections under the ID).
Updating Combined Sections
If you need to update information for an existing Combined Sections ID, you can navigate to the Identify Combined Sections page.
Navigation: Curriculum Management > Combined Sections > Identify Combined Sections
The plus (+) and minus (-) buttons can then be used to add or remove class sections from the ID.
Once sections have been combined, any changes to the meeting patterns for these classes need to be made on the Schedule Class Meetings page. Meeting patterns for combined sections cannot be accessed under the Schedule New Course or Maintain Schedule of Classes menu options.
Navigation: Curriculum Management > Schedule of Classes > Schedule Class Meetings