Support Page Content
Advanced Class Scheduling Manual: Instructor / Advisor Information
Table Of Contents
Setting up Instructor/Advisor Table
The Instructor/Advisor Table allows you to authorize instructors to teach courses within an Academic Organization. When you have a new instructor teaching in your department, you will need to activate them on the Instructor/Advisor Table (an EmplID must already be assigned by HR). This process must be completed for the instructor to be assigned on the Meetings tab when a course is being scheduled.
Navigation: Curriculum Management > Instructor/Advisor Information > Instructor/Advisor Table
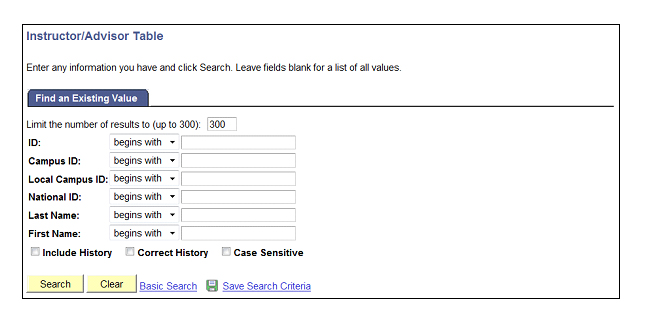
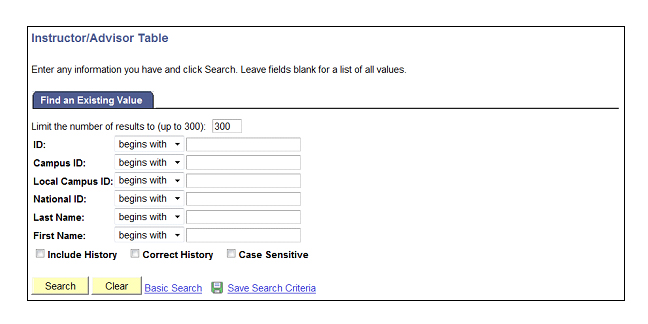
- Enter search criteria to help identify the appropriate instructor. (Figure 25: Search.)
- Click the Search button.
- Depending upon the criteria you entered, you may have to choose from a list of results displayed at the bottom of the screen. (Figure 26: Instructor/Advisor Table.)
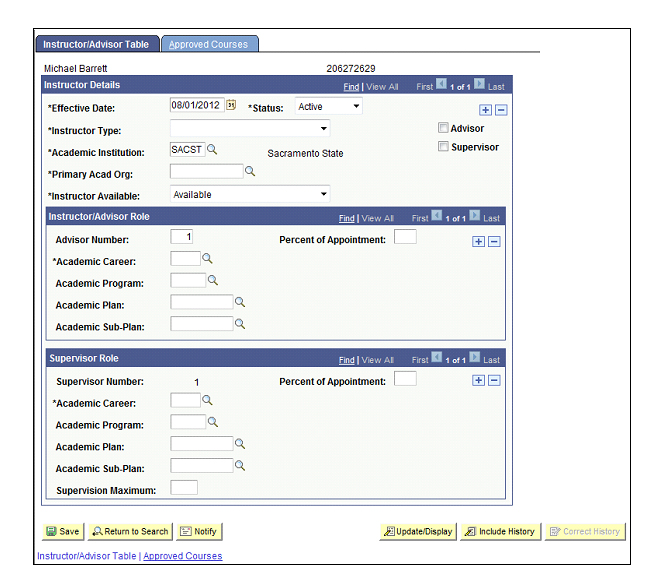
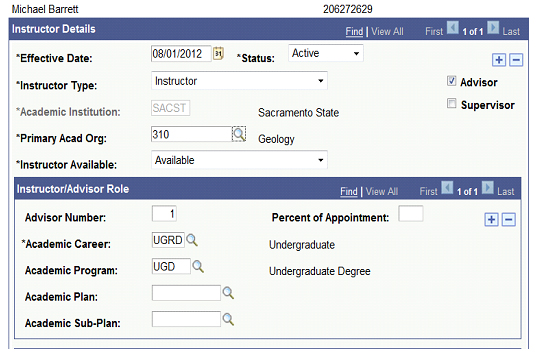
- Enter an Effective Date. Make sure the Effective Date matches the standard date for the beginning of the first semester the instructor will teach. (Refer to table)
- Use the Instructor Type dropdown to select the title which best describes the instructor's position.
- Enter "SACST" for the Academic Institution.
- Enter the Primary Acad Org. This value identifies the primary org associated with the instructor; use the magnifying glass to look up the value if necessary.
- Make sure the Advisor checkbox is checked. This option allows individual students to be linked to the instructor for advising purposes.
Effective Fall 2009, departments will no longer need to maintain the information entered in the Instructor/Advisor Role section. A script has been developed to update this information which is run periodically.
- You have now finished entering data on the Instructor/Advisor Table tab. Click the Approved Courses tab at the top of the page. (Figure 27: Approved Courses tab.)
Now you need to identify the area(s) in which the instructor can teach courses.
- Enter the Academic Org on the blank row. Use the magnifying glass to look up this value if necessary.
Note: Because our campus is authorizing instructors by Academic Org instead of individual course, you will only need to fill in the Academic Org value.
- Click the plus (+) button to add any additional rows and repeat the instructions above to enter course information.
- Click the Save button when you are finished entering all course data.
Effective Dates
SACST has decided to use the following effective dates to represent when courses will begin and end as they relate to terms:
| Term | Begin Date | End Date |
|---|---|---|
| Winter | 01/01/XX | 01/14/XX |
| Spring | 01/15/XX | 05/14/XX |
| Summer | 05/15/XX | 07/31/XX |
| Fall | 08/01/XX | 12/31/XX |

Updating & Inactivating Instructor Information
When an instructor's information changes you will need to update the Instructor/Advisor Table. Never type over existing effective dates (unless you are using Correct History mode to change incorrect data). Instead, insert a new effective dated row. In general, updating and inactivating this instructor information is optional but this process must be completed when an instructor is being authorized to teach in a new Academic Organization.
Navigation: Curriculum Management > Instructor/Advisor Information > Instructor/Advisor Table
- Enter search criteria to help identify the appropriate instructor. (Figure 28: Search page.)
- Click the Search button.
Note: Depending upon the criteria you entered, you may have to choose from a list of results displayed at the bottom of the screen. (Figure 29: Existing instructor data.)
Editing Incorrect Data
- Click the Correct History button to edit information that was entered incorrectly.
- Make the appropriate changes and click the Save button to complete the process.
Updating with new Information
- For updates to instructor information, you will need to click the plus (+) button in the Instructor Details box to insert a new row.
- Add the new information and make sure that the Effective Date is appropriate.
Note: You can add to the Academic Org's an instructor can teach under by clicking the plus (+) button on the Approved Courses tab. (This step can only be done after you have inserted a new row using the plus button in the Instructor Details box.)
- Click the Save button to complete the process.
Instructor Schedules
The Instructor Schedule option under Curriculum Management allows you to quickly look up a list of the classes an instructor is teaching during a specific term.
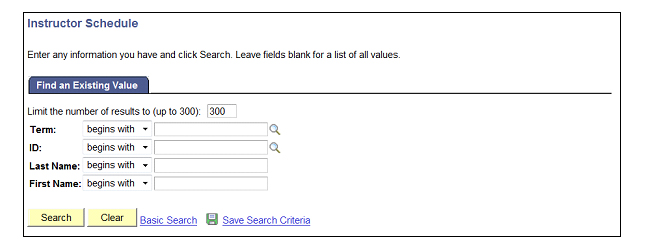
Navigation: Curriculum Management > Instructor/Advisor Information > Instructor Schedule (Figure 31: Instructor Schedule.)
- Enter the desired Term value. Use the magnifying glass to look up the term value, if necessary. (Figure 30: Search page.)
- Enter further criteria to help identify the appropriate instructor.
- Click the Search button.
- Depending upon the criteria you entered, you may have to choose from a list of results displayed at the bottom of the screen.
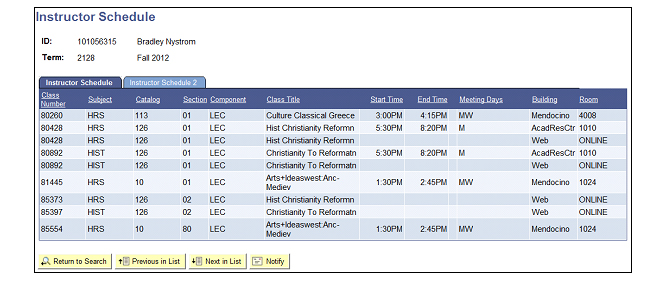
The Instructor Schedule page displays information about each class the instructor is teaching.
- You can use your browser's print functionality (File > Print) to generate a paper copy of the schedule, if desired.
- If you would like to view the scheduled Start and End dates for the classes listed, click the Instructor Schedule 2 tab. (Figure 32: Instructor Schedule 2 tab.)